Sunday, February 26, 2006

New battery for my Suunto Mosquito

I bought my Suunto Mosquito just after my Open Water certification last year. So far I had about 50 dives on it. During the last trip to Jarak, I noticed that it was already low on battery. The manual did state that the battery will last approximately 50 dives - the shortest of all the Suunto models.

Just before going for the crazy dive in the flooded rock quarry a few days ago, I actually changed the battery. Suunto advertises the fact that the Mosquito has a user-replaceable battery. So being a DIY enthusiast that I am, I decided to really go ahead and do it myself. Suunto also recommends that you buy the battery kit that consist of not only the battery but also the battery compartment plastic lid and the O-ring. The problem is that the kit is expensive. So off to the corner camera shop to get the CR2032 battery. It only cost me RM14!

Opening the battery lid is not easy. First find a coin that fits well into the groove and twist it in the direction indicated. It should move by about 20 degrees. I made the mistake of using a smaller coin and made a little mess. The plastic is rather soft and I found out that you can easily cut into it. So be careful not to damage the lid.

After turning the lid, you have to gently pry it off. It's stuck very tight so I used a small stiff pen knife to pry it off. Be careful not to dig too deep into the groove between the lid and the body of the computer and damage the O-ring or more importantly don't make any scratches on the area where the O-ring contacts.

After replacing the battery, apply a thin coating of silicon grease to the Tiny O-ring on the lid. Replace the lid and screw it back on firmly. That's about it.

The quarry dive was the first test since then. I'm glad to report that it functions perfectly.

I'm not sure how many time I can re-use the plastic lid. It seems to be made of soft resin or plastic so the catch may wear out after a few times of unlocking and locking it into the computer body.

If you want to save a bundle and don't mind taking the risk, then just go ahead and replace the battery yourself. It's really very simple.
Friday, February 24, 2006

Diving in the City

It’s getting nearer to the end of the monsoon season and the nitrogen withdrawal symptoms must be really bad. A few days ago my friend and diving instructor Nick asked me whether I’d be interested in trying out a new lake he found somewhere in Damansara Perdana. I, like any true dive junkie, immediately said yes. For those of you who are not familiar with the area, it’s a suburb just several kilometers away from Kuala Lumpur city center.

This morning we met at half past eight in the morning for breakfast in Shah Alam. Lee (another PADI instructor) drove Nick and me to our regular restaurant nearby for “Nasi Lemak” and “Roti Telur”. There we met up with yet another PADI instructor Kelvin (I hope I got your name right).

After stuffing ourselves we made our way back to Dolphin Sports dive center in Matsushita Sport Center where Lee runs his dive and swim shop. We loaded up our gear into my car and off we went.

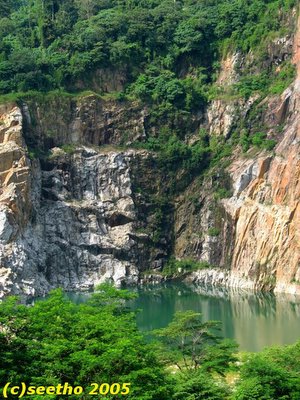
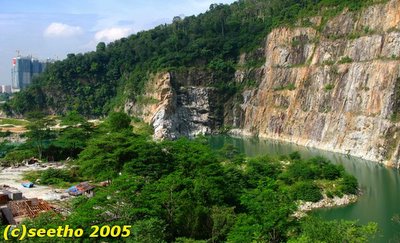
We soon made our way to the dive site. It wasn’t actually a lake but a flooded rock quarry by a construction site!


The view from an apartment complex on top of the hill nearby the quarry.

I drove my car as near as possible to the banks. We still had about 4 meters of rocky slope to get our gear and ourselves down to the edge of the water. It was really hard work getting all that gear down – especially the tanks. The hot late-morning sun didn’t help at all.


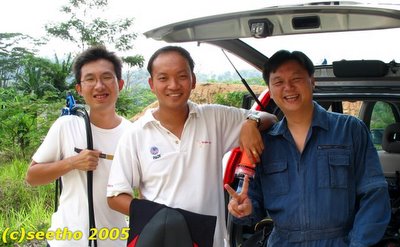
Kelvin, Lee and Nick unloading the gear from the back of my car.

Kelvin opted not to dive, so it was only the three of us. In retrospect, I think he turned out to be the most sensible among us.


Lee suiting up on the edge of the water.


Nick in his commercial diving overalls up to his waist just barely one step away from the sand bank.

The water didn’t smell bad – that’s a good sign! I could see schools of small fishes near the surface, so it’s probably not some toxic waste dump – another good sign! However the water looks really green – reminds me of Pulau Jarak! “Doesn’t look too bad” I thought. Hah! Was I ever wrong!

Nick takes one step into the water and he’s already up to his waist. The bottom was a layer of soft sand over very fine silt. Step on it and your feet sink into the muck up to the top of your ankles. It feels a little like it’s pulling at your feet.

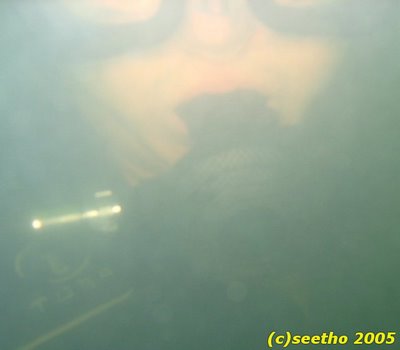
We moved to deeper water and gave each other the signal to dive. The moment we went it I immediately lost sight of the others. Visibility was almost zero! If you stretch your arms out you’d not be able to see your fingers! I swam around with outstretched arms in the hope of finding the others. I could barely read my dive computer to check my depth. I couldn’t even tell whether I was going up or down – the pressure on my ears gave me some rough indications. It was around 4 meters and I bumped into Nick briefly, and in a split second I could not see him again. It was hopeless and I decided to surface. In fact we all can up one after another within seconds. None of us knew where the other was even though we were only a meter or two from each other.


This is exactly the condition of the visibility. Nick was at about 2 meters depth and just centimeters away from my camera.

On the surface, we decided to give it another go but this time we would hold on to each other as we moved along. Down we went again 3 abreast. Slowly we descended while moving forward. At about 8 meters everything became really dark. We had to use our dive lights. After a while we hit bottom. It was 13 meters. The three of us formed a circle and then sort of stared at each other for a while. I don’t think there was much we could do under such conditions. Several minutes passed and Nick gave us the ascend signal. All of us agreed and slowly made our way up. Lee had already deployed his sausage earlier and we held on to him while he solely wound on his reel to control our ascend rate.

When we reached the surface we could only burst out in laughter.


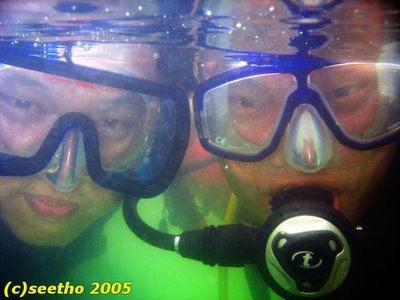
Lee and I near the surface.


Nick and Lee near the surface.


Nick and Lee on the surface.

A hour of loading up our gear, half an hour struggling in the hot sun to get out gear down to the waters edge, another half and hour to pack our stuff up, and finally an hour of cleaning up. All that effort for 10 minutes of dive time in near zero visibility!

Was it worth it? Probably not – but it was definitely an interesting experience. Kelvin thinks that we are a little crazy - hmmm.... maybe. A small group of people fishing on the opposite bank probably agrees with him.


The craving for nitrogen will hit us again and the dark green water of a rock quarry will once again look like diving paradise.


It looks so beautiful from afar.

Saturday, February 04, 2006

GIMP and Some Crappy Photos from Dayang

November 19th and 20th was to be the final dive trip to Dayang Island before it closes for the monsoon season in 2005. I have just bought a new digital camera after weeks of research into which affordable digital camera that will hopefully give me some good underwater pictures. Finally I settled on the Canon A610 with the WP-DC90 housing. This will be my first time using a camera underwater.

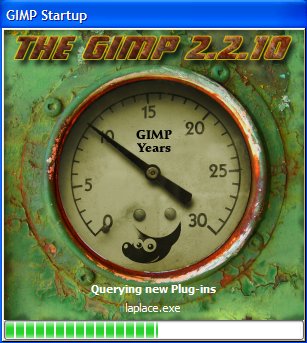
Not unexpectedly most of the photos were really crappy. Only about 3 out of 200+ photos were good enough to use as is. However a really nice piece of software came to my rescue. No it’s not Photoshop – it’s an incredible piece of software but I can’t afford it. Instead I use something almost as good – GIMP. It’s free! I’ll tell you more about GIMP later.


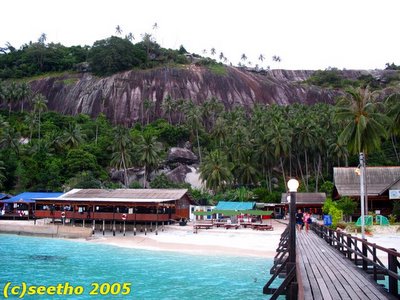
Dayang Island Resort

This is my first time to Dayang. I was warned by others that the resort is very basic, the food basic, the boat ride uncomfortable and the dive sites crowded. They were right! Dayang is mostly frequented by divers from Singapore. In this trip I think I was the only Malaysian on board (other than the crew… but then again they could be Indonesian). My group consisted of all Japanese – dive friends of my wife.


Dayang Island Resort.

The boat is crowded and this is not peak period for Dayang trips. I hate to see it when the boat is really full.

On the way from Mersing, just past midnight, it rained and everyone had to jam into the lower cabin. There was hardly enough space for everyone. The rain was seeping through the upper deck and leaks were everywhere. I don’t think any of us managed any sleep in the hot, wet and stuffy conditions.

The next morning we arrived after 4am. All of us just went straight to our assigned bunks and I managed about 2 of sleep, skipping the early morning dive.

After breakfast I went for a checkout dive. I didn’t take my camera as I was unsure of the conditions there. The second dive onwards I had my camera with me. In all I made 5 dives with the camera and all I got were crappy pictures. I seriously needed some digital help to salvage my trip.


GIMP

“GIMP is the GNU Image Manipulation Program. It is a freely distributed piece of software for such tasks as photo retouching, image composition and image authoring. It works on many operating systems, in many languages.”- excerpt from the official GIMP web-site.


GIMP was created 10 years ago somebody who wanted something with the capabilities of Adobe Photoshop. Photoshop is an excellent piece of software but it is expensive. Most people (me included) will not be able to afford it. I’d rather save the money to buy a strobe.


For the purpose of improving the look of your digital photos, GIMP is more than capable. In fact in the help file, you can find specific information about how to improve your digital photos.


What I did to my photos

I don’t have an external strobe, so almost all my photos suffer from poor colour balance. More than half of them turned out green and completely useless. Some of them had enough of the other colour in them to be rescued by doing white balance adjustments in GIMP. Most of the time I use the Auto-White-Balance function. It works well most of the time. Only occasionally do I need to resort to manually adjusting the white balance.

Beside white balance adjustments you can also adjust the contrast level and colour saturation to give you more vivid colours and avoid that washed out look.

Another problem I noticed from my photos is that they were almost always poorly composed. It’s not easy getting a well composed picture underwater especially in strong current, and most of the time the “models” are very uncooperative. This can be fixed rotating the image and then cropping. I always crop my images to improve the composition. The results can be very dramatic. 5 megapixels is enough to allow some very liberal cropping.

Another very useful tool is the smudge tool that I normally use to remove some annoying bright specks resulting from backscatter.

Other tools available like noise reduction and sharpening filters are available but I rarely use them. I don’t want an artificial look to my photos.


The results

Instead of just having 3 images to show for this trip, I now have a few more presentable images thanks to GIMP.

Overall I must say that it’s not a bad effort for a first time – sleep deprived – underwater photographer with a very basic camera setup.

I did improve on my second outing to Jarak (see earlier post) and I hope to continue improving. If I do get a crappy shot now and then I know that there’s still hope with GIMP around.


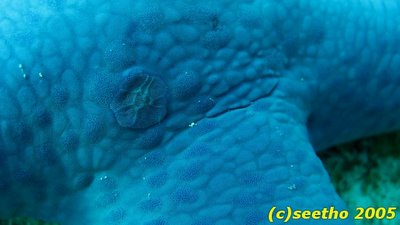
Giant blue starfish – Linckia laevigata. The disc is the madreporite – a porous sieve like plate that allows the starfish to draw in water into its vascular system. Water pressure is used in keeping its shape and in locomotion.


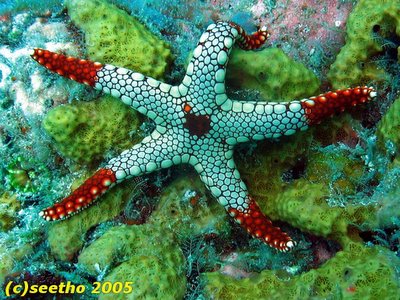
Starfish - Fromia monolis.


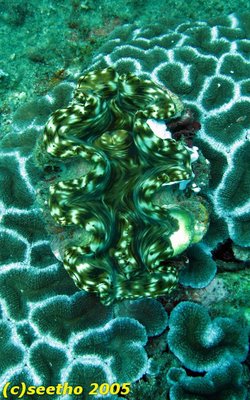
A small giant clam – Tridacna maxima. Listed in the IUCN Red List of threatened species. Giant clams grow to enormous sizes by having a symbiotic relationship with zooxanthallae algae which is found within its mantle tissue. The algae like in coral polyps produce food for the giant clam – up to 90% of these clams requirements. Like coral, these clam require sunlight to allow the zooxanthallae to function.


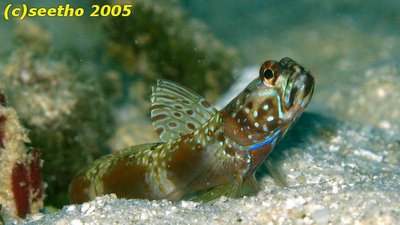
Metallic shrimp-goby - Amblyeleotris latifasciata. I only managed one shot before it quickly disappeared into its burrow.


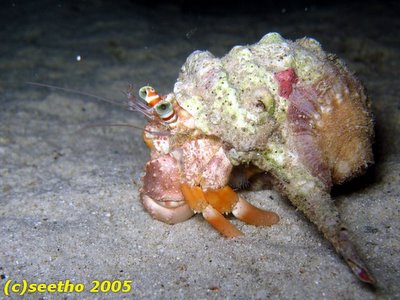
Fist size hermit crab. It kept turning away from me. Probably very camera shy.


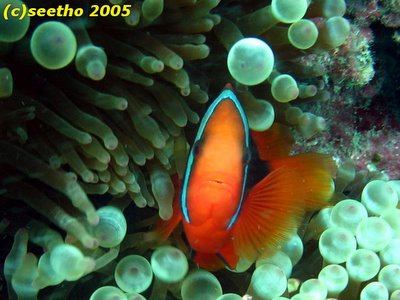
Tomato anemone fish – Amphirion frenatus. This female is aggressively defending its patch of Bulb-tentacle anemone - Entacmaea quadricolor.


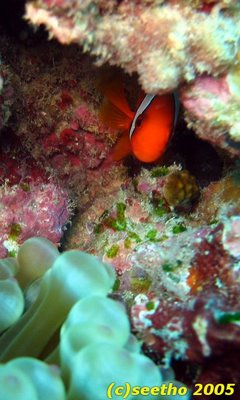
The much smaller male hides from the bubble blowing monster.


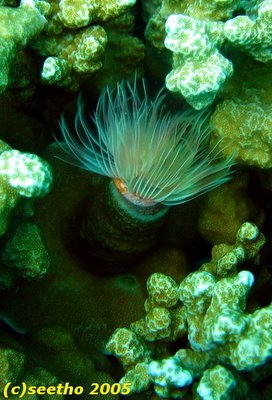
Polychaete worm embedded in coral.


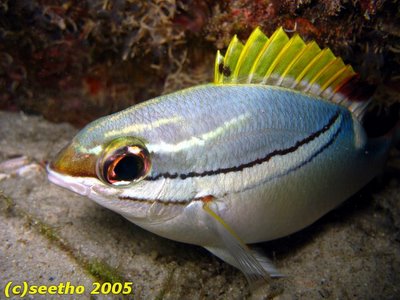
Bridled monocle bream – Scolopsis bilineatus. The one photo from this trip that I did not have to crop to improve the composition. It was just sitting there posing (or sleeping). At one point I got too close that the front of the camera bumped into it, but still it didn’t budge.


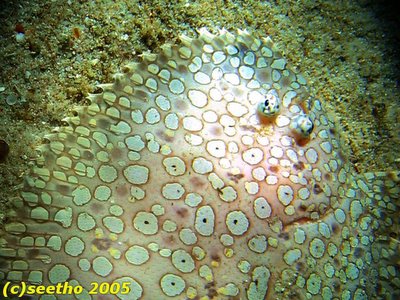
Peacock sole – Pardachirus pavoninus. We saw two small specimens of these in one night dive. This photo was illuminated by my dive light only.


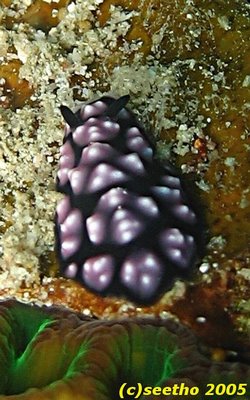
Nudibranch – Phyllidiella pustulosa.


A pair of Phyllidia varicosa caught making out.


Nudibranch – Phyllidia elegans.


Nudibranch – Fryeria menindie.


Nudibranch – Phyllidia ocellata.


Storm approaching Dayang (left) and Aur (right). This was taken just before we were scheduled to return to Mersing. It did actually catch up with us resulting in a very uncomfortable boat ride.

Wednesday, February 01, 2006

At What Depth Did I Take That Photograph?

Happy year of the dog! It’s the Chinese New Year holidays and we have three days of public holidays starting Monday. I’m in no mood to go back to work for just 2 days so I took Thursday and Friday off as well. So I have 9 continuous days of absolutely nothing to do. What better time to update my blog.

I always have trouble remembering what I saw after a dive. Having a camera helps a lot. Photos are also really useful when you want to identify exactly what you saw. While researching the identity of the subjects I often come across interesting bits of information that make the whole diving experience more satisfying. Isn’t it a more enriching experience when, for example, you see a giant clam and you get thoughts like: “…these guys have blue or green Zooxanthallae inside them that produces part of their food requirements, instead of just sitting there filtering the water for passing plankton. That’s why they can grow so big…”; instead of “… hey look giant clam… I wonder how they taste… yuck it looks blue and green… it’ll make me sick… hey look another one of those colourful fishes…”.

As you can see from my previous post, I always record the depth at which I made the particular photograph. No, I did not stop to write it down on my slate. That would be too much tedious work. What I do to get depth information from all my photos is really easy.

Before the first dive of any trip, I normally synchronize the clock in my camera to the time on my dive computer. The JPEG files produced by the camera carry, among other things, a date (and time) stamp. This information is preserved even when the file has gone through some image processing (e.g. with GIMP). Note that this date stamp is not the same date stamp recorded by the operating system of your computer.

A screenshot of popup window with some image information recorded by the camera.

If you are using Windows XP like I do, you can see this date stamp by just putting your mouse pointer over the file (or thumbnail) in Windows Explorer. In a moment a popup windows appear that shows the “Date Picture Taken” piece of information. It does not show the “seconds” but having the time to the closest minute is good enough for my purpose. You can also look at the advanced properties of the file to view all the stored image information.


My Suunto Mosquito dive computer and my Canon A610 camera inside the WP-DC90 housing.

When I come home from a dive, I normally plug my dive computer to my PC to download all my dive profiles. Incidentally, I built my own Suunto interface using the instructions found on this site: Roli's PC Interface for Suunto® ACW® Dive Computers. It’s cheap and simple to build. Just don’t go suing anyone if it fries your dive computer!

The dive profile shows you your time and depth profile. From here you instantly know at what depth your photographs where taken – simple!


My home made Suunto Mosquito PC interface device.